
If you're not good at programming and want to change
Menu What exactly is programming these days? What kind of process is it? Many skilled engineers and programmers don’t want to teach, …

I will show you how to actually put something together using the programming thought process I introduced in the last article. This thought process is basically generic, so if you can imitate it, you will definitely improve. As I wrote last time, please note that this article is targeted at beginners who are worried about not being able to improve easily.
This time, the Assumed Engineer Level is as follows. I will try to proceed with this level of thinking thoroughly.
Then try to follow the thought process introduced in my previous post.

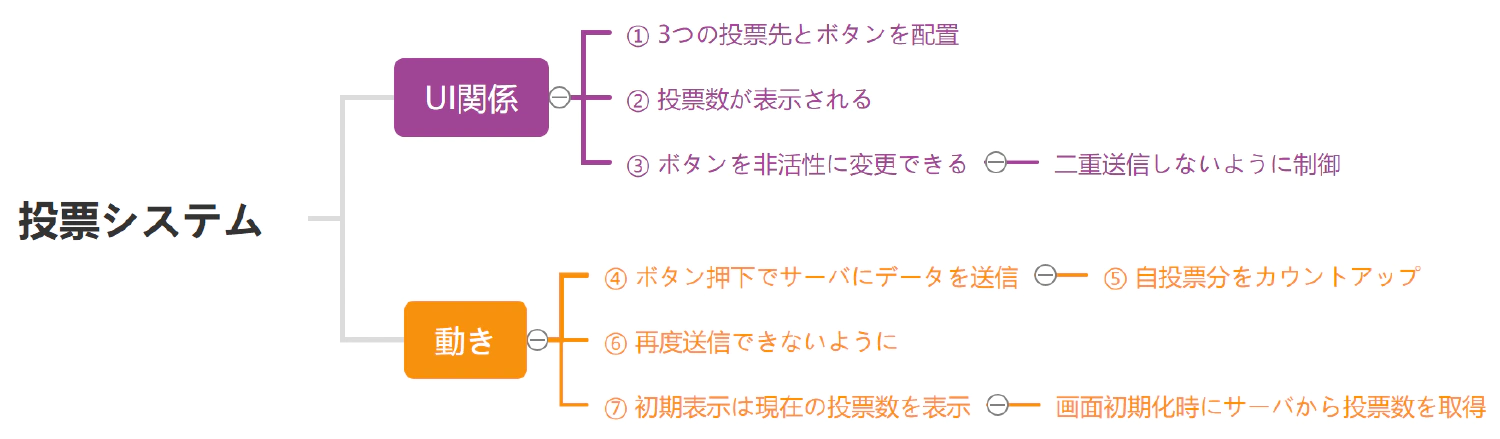
In this article, we will assume that we are implementing a simple “Website Voting System”. However, preparing the server side will be costly, so this time we will only use the browser side. The requirements are as follows.
※We will not prepare a backend, so we will assume that the API for sending data and the API for getting the number of votes already exist.
It’s a simple system this time, but think about this process carefully. And if you’re not used to it, make sure to write down all the tasks. It’s cool to think in your head and start programming, but for beginners, the trick is to write it down in Japanese. Don’t be shy.
Now that I’ve broken down the tasks, I’m going to Google the means to these tasks.
Let’s start with the UI, and write the three polling place names and buttons in HTML. There’s nothing to look up for this one.
<div class="contents">
  <div>
    <h5>ドラえもん</h5>
    <button>投票</button>
  </div>
  <div>
    <h5>アンパンマン</h5>
    <button>投票</button>
  </div>
  <div>
    <h5>カカロット</h5>
    <button>投票</button>
  </div>
</div>
Slightly tweak the look of the buttons by putting the three blocks side by side.
I copied the style directly from the article that came up at the top.
.contents {
  display: flex;
  flex-wrap: wrap;
  width: 100%;
}
.contents > div {
  width: calc(100% / 3);
  text-align: center;
}
.contents button {
  color: #fff;
  background-color: #eb6100;
  border-radius: 100vh;
  border: none;
  padding: 5px 15px;
}
.contents button:active {
  opacity: 0.5;
}

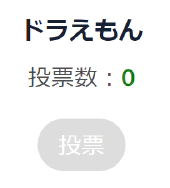
Since we will implement getting and displaying the vote count itself later, we will first display only the UI in HTML. Display “0” for the first time.
<div class="contents">
  <div>
    <h5>ドラえもん</h5>
    <p>投票数:<span class="count">0</span></p>
    <button>投票</button>
  </div>
  <div>
    <h5>アンパンマン</h5>
    <p>投票数:<span class="count">0</span></p>
    <button>投票</button>
  </div>
  <div>
    <h5>カカロット</h5>
    <p>投票数:<span class="count">0</span></p>
    <button>投票</button>
  </div>
</div>
.count {
  color: green;
  font-weight: bold;
}

Let’s go ahead and create the look and feel of a button that cannot be pressed. If you don’t know what that means at this point, Google will still give you the answer.
I soon found out that I could deactivate the button by adding “disabled” to the button tag.
Hmmm…. Let’s try adding “disabled” to the button tag. Then the button is indeed disabled, but it doesn’t look like it’s disabled. Let’s try again.
The way to write CSS will come up soon.
.contents button:disabled {
  background: #ddd;
}
Finally, the next part is the movement part, so it’s time for Javascript. Let’s break down the “Send data to the server by pressing a button” into two simpler parts. Think of it in terms of two parts: “On pressing the button” and “Send data to the server”.
I’ll just use the sample from the page that came up at the top.
<button onclick="buttonClick()">投票</button>
<script>
function buttonClick(){
    alert('Click');
}
</script>
When I click on the vote button, I get an alert. That means that if I write something in the buttonClick function, I can execute some process “on button press”.
The article at the top says that you can use XMLHttpRequest to communicate. I’ll try to modify it by pasting the sample code as it is. If you read the article, it tells you how to change the destination URL and the data to be sent.
function buttonClick(){
  var send_data = new XMLHttpRequest();
  send_data.open('POST', 'https://i-407.com/');
  send_data.setRequestHeader('content-type', 'application/x-www-form-urlencoded');
  send_data.send('id=1');
}
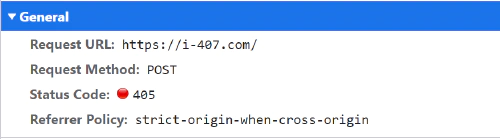
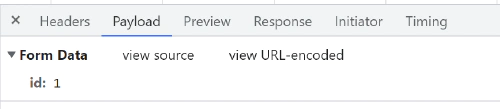
Let’s press the vote button for once here. When I run Chrome inspector and look at “Network”, I can see that it is indeed transmitting data. And if you look at the Payload, it’s sending “id: 1”. (The destination is a non-existent URL in my domain, so I’m getting a 405 error.)
So I guess I can implement it correctly by changing the fixed “id: 1” coding to an id for each voting target. If you are a beginner, you might do the following. If you’re a beginner, you might do the following: rename the function and copy three of them. It’s not good code at all, but it’s okay for once.
function buttonClick1(){
  var send_data = new XMLHttpRequest();
  send_data.open('POST', 'https://i-407.com/');
  send_data.setRequestHeader('content-type', 'application/x-www-form-urlencoded');
  send_data.send('id=1');
}
function buttonClick2(){
  var send_data = new XMLHttpRequest();
  send_data.open('POST', 'https://i-407.com/');
  send_data.setRequestHeader('content-type', 'application/x-www-form-urlencoded');
  send_data.send('id=2');
}
function buttonClick3(){
  var send_data = new XMLHttpRequest();
  send_data.open('POST', 'https://i-407.com/');
  send_data.setRequestHeader('content-type', 'application/x-www-form-urlencoded');
  send_data.send('id=3');
}
This completes the JS code that sends id=1,2,3 to the server when the respective button is pressed. (This way of writing is not very maintainable, so I’ll fix it later.)
Now it’s time to implement the counting up of the votes. Currently, the count part displays a fixed “0”, right? I want to make it plus one when the button is pressed. We don’t want it to be “1”, just “plus 1”. This is actually the most difficult part of the implementation, because it requires DOM manipulation using HTML JS, and that requires knowledge.
However, I want to show that even a complete beginner can do this, so google the following.
The following page came up at the top.
https://javascript.programmer-reference.com/js-dom-inntertext/
I think I can change the numbers by using the innerText in the js shown in this page. I'm going to copy and paste most of the code from this page and try the following.
<div>
    <h5>ドラえもん</h5>
    <p>投票数:<span id="target1" class="count">0</span></p>
    <button>投票</button>
</div>
function buttonClick1(){
  var send_data = new XMLHttpRequest();
  send_data.open('POST', 'https://i-407.com/');
  send_data.setRequestHeader('content-type', 'application/x-www-form-urlencoded');
  send_data.send('id=1');

  document.getElementById("target1").innerText = "変更しました";
}
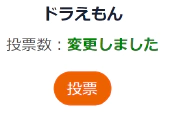
When you pressed the button, the “0” changed to “Changed”. Now, take the original number (0), add 1 to it, and rewrite it in the same way, and you’re done, right? Then, this time, Google the following.
Let’s take a look at the page that came up in the search.
https://kita-note.com/js-edit-text
A quick read of this page tells me that I can use a property called "textContent" to get the html content that is displayed. So, what if I do the following, plus one?
function buttonClick1(){
  var send_data = new XMLHttpRequest();
  send_data.open('POST', 'https://i-407.com/');
  send_data.setRequestHeader('content-type', 'application/x-www-form-urlencoded');
  send_data.send('id=1');

  var cnt = document.getElementById("target1").textContent;
  document.getElementById("target1").innerText = cnt + 1;
}
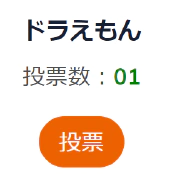
This was a mistake. The display was supposed to be “1”, but it turned out to be “01”. Of course the programmer should have known the reason for this.
The article that appeared at the top.
https://pinkmonky.net/detail/?id=61
In other words, variables have a type, and the value obtained by textContent is a "string", and the "+" in JavaScript also works as a string concatenation, so it would have been "01". I'll try to fix it using the method on this page.
function buttonClick1(){
  var send_data = new XMLHttpRequest();
  send_data.open('POST', 'https://i-407.com/');
  send_data.setRequestHeader('content-type', 'application/x-www-form-urlencoded');
  send_data.send('id=1');

  var cnt = document.getElementById("target1").textContent;
  document.getElementById("target1").innerText = parseInt(cnt) + 1;
}
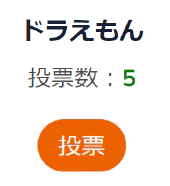
Now it will count up every time the button is pressed. Now, copy and paste the same process for the other two, and you’re done.
This is just a matter of giving the button element the disabled implemented in “3) Button can be changed to inactive” above at the end of the button click process. Now let’s move on.
I’m going to try it as per the article that came up at the top.
function buttonClick1(){
  var send_data = new XMLHttpRequest();
  send_data.open('POST', 'https://i-407.com/');
  send_data.setRequestHeader('content-type', 'application/x-www-form-urlencoded');
  send_data.send('id=1');

  var cnt = document.getElementById("target1").textContent;
  document.getElementById("target1").innerText = parseInt(cnt) + 1;
  document.getElementById("button1").disabled = true;
}
When you press a button, the button becomes inactive and you can’t press it again, right? Of course, voting means that all buttons other than the one you pressed must also be disabled. For now, we’ll set all buttons to disabled.
  document.getElementById("button1").disabled = true;
  document.getElementById("button2").disabled = true;
  document.getElementById("button3").disabled = true;
The last step is to display the initial count. Of course, as above, we just need to put the value in innerText. The initial display is assumed to be obtained from the server. (Assuming that the server is already implemented.)
The way to get the data from the server is as described in the page that appeared in “Sending data to the server”. The problem is how to get the data from the server in js when the page is initialized.
According to the page at the top of the page, you can also use window.onload. Copy and paste, copy and paste.
window.onload = function(){
  var data_url = new XMLHttpRequest();
  data_url.open('GET', 'https://i-407.com/'); //This URL needs to be the actual API URL
  data_url.send();

  data_url.onreadystatechange = function() {
    // Since we don't have an API implementation this time, we'll put a temporary random value here.
    document.getElementById("target1").innerText = Math.floor(Math.random() * 11);
    document.getElementById("target2").innerText = Math.floor(Math.random() * 11);
    document.getElementById("target3").innerText = Math.floor(Math.random() * 11);
  }
}
Now it’s finished!
The complete voting system is on the following page, so look at this page for the complete source.
Seriously, I completed a web system just by copying and pasting an article that came up at the top of a search term with almost amateur knowledge. I know some of you may say, “Don’t go on and on about such a simple implementation,” but what I want to tell you in this article is not the implementation method. What I want to tell you is not how to implement it, but that Google search and copy and paste is the basis of programming, and that writing code is an easy job that anyone can do.
So, what was the most difficult task this time, and the one that not everyone could do, was to “break it down into tasks and list them”. I hope this will change your mind about programming a little bit. It’s more important to think about and enumerate the tasks before writing code than it is to do it by hand, and that’s what I use my brain for. In other words, if you’re a beginner or someone who can’t get better, you can quickly become an intermediate or above if you polish up this “breaking it down into tasks and enumerating them. You can become an intermediate or above in the shortest distance, you know?
“Object-oriented”? or “interface”? I’ll get to that later. If you can’t “break it down into tasks and enumerate them,” you can’t do anything.
In the next article, “4. Look back to see if there were any problems with the means or tasks”, we will refactor the above uncode. Problems tend to occur when you do something like this, where you just want it to work. However, completing a project by yourself is one of the most enjoyable and successful experiences, isn’t it?

Written By Ason
I am a small business owner who wants to be a programmer forever. The only thing I can be proud of is that I have a good bowel movement. I am an expert at defecation.
Menu What exactly is programming these days? What kind of process is it? Many skilled engineers and programmers don’t want to teach, …
Menu Now that you are finally ready to start programming, you need to prepare an editor. In short, an editor is a tool for writing program …